

shift838
-
Posts
26 -
Joined
-
Last visited
Content Type
Profiles
Forums
Blogs
Gallery
Store
Events
Downloads
Everything posted by shift838
-
I have completed my testing on both the TI-99/4A and Geneve with the new IDE card. I have been able to exercise all functions for IO operations on both TI and Geneve. With the Geneve, I had to use the development version of MDOS to address the IDE issue (v7.42). Please note, the RTC chip that will be offered will be the 5v version as it supplies the voltage required for the SRAM control and the 5v version seems to be more stable, this does increase the price of the board by around $15. Preorders will open soon. I still want to put it through some more paces before on both the TI and Geneve. I will also be replacing the standard 1.5 amp 7805 voltage regulators with a 2amp DC/DC converter. It runs much more stable and the heat it generates is on average between 40 - 50 degrees cooler than the LM7805.
-
update... I have received the latest prototype boards and I have put one together and it functions so far with no issues. Currently I have only tested on the TI-99/4A, but will be testing on the Geneve soon. Changes: Fixed handful of connection errors Converted to a 100% through hole design with a different SRAM (had to re-route a couple of signals as they are different than the original design) The board now uses my 838 Clock module. The one picture can use either the 3.3v or 5v version of the BQ4802. The 3.3v is 1/3 of the price. Please note, there are 2 connectors on the board. You can only use one at a time. If you need master/slave they need to be on the same connector. Changes for production board: I want to use a larger, thicker and better heatsink help with the heat generated on the 7805 regulator if I don't go with a V7805-1500R which is better for heat (no heatsink required) - will require some capacitor change for the power and will increase cost by around $12 for the board. I will add ground planes. Prototype did not have ground planes to make it easier if I needed to cut traces since there are quite a few signals on the board.

-
I found another error on the board, so I'm up to 5. I have decided to make the entire board through-hole. I have also made it compatible with any of my 838-RTC modules for the previous IDE board design. So, this will allow someone to use an existing 838-RTC module for the clock. I did have to swap a couple of address lines for the new through-hole 512k SRAM, but that was easy enough to do. Here is the latest render.

-
The IDE clock is a different beast and the DSR is has completely different calls, for example in TI Basic to display both time and date you issue CALL IDETD and the IDE card will respond to show current date and time. To pull specific time/date values from the IDE cards RTC you can use a small program for example: 100 OPEN #1:"IDE.TIME",INTERNAL,FIXED 110 INPUT #1:SEC$,MIN$,HOUR$,DAY$,MONTH$,YEAR$,DAYOFWEEK$ 120 CLOSE #1
-
Put one complete together and made the wire runs for the errors I found, just a few. there is 2 issues I have to chase. 1. Does not detect the clock chip for some reason. I'm using the same circuitry design I used for my RTC module for the original IDE card. I have gone to a 3.3v version of the RTC and SRAM as the 5v version of the BQ4802 is pushing $20 USD each. The 3v version is 1/3 the price. 2. Does not keep time, whatever you set it does not cycle the seconds, it just stays at what you set it. Almost sounds like a crystal issue. I think once I fix the clock chip not being detected by Fred's IDE DSR loader it will fix #2 as well. on the upside, I have plugged in a Transcend 44pin 4 meg module as you can see in the photo and was able to detect it, partition the unit with 4 partitions and initialize each partition no problem. Almost there!

-
The battery is used for the RTC, the original IDE card that had the older RTC chips had their batteries built into the IC and when they went out you had to Frankenstein it to get to the connections to hook up an external battery. if you want to see one that I did check it out on my site: https://www.shift838.com/bq4847-frank.html
-
Just need to add the IC's and I can test...

-
only found a few connection errors from my check that will require a few jumper wires. will be starting to populate the board tomorrow.
-
Wanted to start a new thread for all updates rather than posting them to the poll topic. I have received the prototype card today. I will be doing a once over on it to make sure all is good (according to my schematics) then start populating it with components.

-
Looks like the standard 40 pin IDE connector won for the vote from the sites I posted it on. I have rendered the final card in this latest photo. I am keeping the 44pin IDE connector on there as well for additional connection options. I have gone through the traces on an unpopulated IDE board I have and compared them to my schematic I have hammered out probably 10 times. I did find a few errors or missed connections, fixed those so all seems good now. I have ordered a prototype run of 5 boards today. Should see them in the next couple of weeks. Tomorrow I will order the components I don't have in stock. Keeping my fingers and toes crossed all will be good.

-
I rendered a version with the F543 as through hole as a stock has been found. This render also has the standard 40 pin IDE and 44 Pin IDE headers. I have also added a jumper for 5v and GND to be easily tapped into if needed and a 3.5 molex type male power connector.

-
This card is used in the Ti PEB or the 838-PEB. This card allows IDE hard drives to be connected to the TI and you can use up to 2 physical units. 250mb per partition, 4 partitions per unit. (IDE1-8) drives.
-
If you voted on AtariAge, please do not vote here. For the last couple of years, I have been tracing the current IDE card signals off and on to try and get a design that has mostly through-hole components. I believe I have one ready for prototyping but wanted to check interest among the community. Let me be clear, this new design does NOT offer any new functionality. What it does is convert 95% of the SMD components to through hole with a few exceptions. The 74F543 is still SMD, there is no current active through-hole part. The F543 was made at one point for through-hole but it is obsolete. I have found a supply of them, but I really want to keep the card using current 'ACTIVE' components. The RTC, SRAM, a 3.3v voltage regulator as well as the CF Card connectors are all SMD. I chose to go with dual CF Card connectors in order to have IDE1-4 on Master and IDE 5-8 on Slave CF Cards. The whole unit will still be compatible with Fred Kaal's latest IDE DSR. The card will still function the same. If interest only shows for a single CF Card then I could convert that to through hole if needed, but more is better right? Anyway, here is my first rendering of the card. I thought about adding a battery charge circuit for a LR2032 to be used, but using the LR2032 can be tricky as I have found multiple suppliers and many of them have different charge specifications. If someone replaces the LR2032 with one that does not have the same charging specifications that could result in frying the card, fire, and a slew of other issues. So, I will stick with no charge circuit for this since the DSR takes about 1 minute to reload anyway. I decided to go with CF Card connectors as lately I have purchased about 10 IDE drives and 6 out of 10 were bad. Not a good ratio, and since CF Cards are completely compatible with no extra circuitry for IDE (Unlike SD cards), it seemed to be the logical choice. Anyway, here is a render of the card along with the poll if you are interested.

-
this game does require a disk system (currently), 32k, TI Extended basic. If you have XB or a FinalGROM99 along with a tipi it will work too.
-
In the archive are also .z3 and .z5 files so it can be played on Windows, Mac, Linux with engines like Frotz.
-
I have released my new adventure game called 'The Forgotten Pyramid '. I have the .z3 and .z5 files along with disk images for 25 additional systems. Please read the README file in the archive for notes on your system if there are any. Requirements: TI-99/4A, (40 column standard, 80 column 9938/58, F18A) 32k, disk system and Extended Basic. It can be put on a real floppy with a GreaseWeazle if needed. Intro: In the remote villages of Peru, nestled amidst the breathtaking landscapes of the Andes Mountains and dense jungles, a remarkable tale unfolds. It's the story of an extraordinary individual who dedicated his life to making a difference in the lives of those less fortunate. His unwavering commitment took him to the far corners of Peru, delivering essential food and medical supplies to small, isolated communities. For years, our protagonist fearlessly piloted his aircraft, navigating treacherous terrain and unpredictable weather conditions. Each flight was a lifeline for those in need, a beacon of hope in the face of adversity. He witnessed firsthand the resilience and courage of the villagers, who faced daily challenges with grace and determination. But one fateful day, as he embarked on his return journey from a successful supply drop, the skies betrayed him. A storm, fierce and unexpected, descended upon the aircraft with an unforgiving force. In a split second, lightning crackled through the air, striking the fragile metal bird that had carried our protagonist through countless missions. In that heart-stopping moment, he knew his only chance of survival was to bail out into the vast expanse of the Peruvian jungles below. In this adventure you will need to collect 13 treasures and complete 6 tasks to complete the game. Your maximum score is 200. Download archive HERE

-
All, I have created a short video of how to read and write disk for the TI-99/4A using the GreaseWeazle hardware. HERE
- 1 reply
-
- 1
-

-
All boards have been received. Starting to build out orders now to start shipping.
-
the Preorder closed and all boards and components have been ordered. I should see the boards in 2 - 3 weeks.
-
First image I have created is the latest version of the Telnet utility for Classic99 to be loaded up as a user cartridge. First off you will need to edit your classic99.ini file and add the below then copy the telnet.bin file to the respective directory. Be sure to change the 'usercart#' to the next available from your .ini file. I place all my user carts in a folder called 'mods' under the classic99 folder. If you have a different folder path then make sure you change it below to match what you have. [usercart##] ; *** Telnet name="TELNET" rom0=8|0000|8000|mods\telnet.bin So to load up telnet in the latest version of classic99 just go to Cartridge --> User --> Telnet No need to load it up via Editor Assembler, XB Option 5 loader or even loading it via the CALL TIPI command set. TELNET.bin
- 1 reply
-
- 1
-
-
Thought I would start this topic off here. This thread will be for any Classic99 related software for Carts, Disk, etc..
- 1 reply
-
- 1
-
-
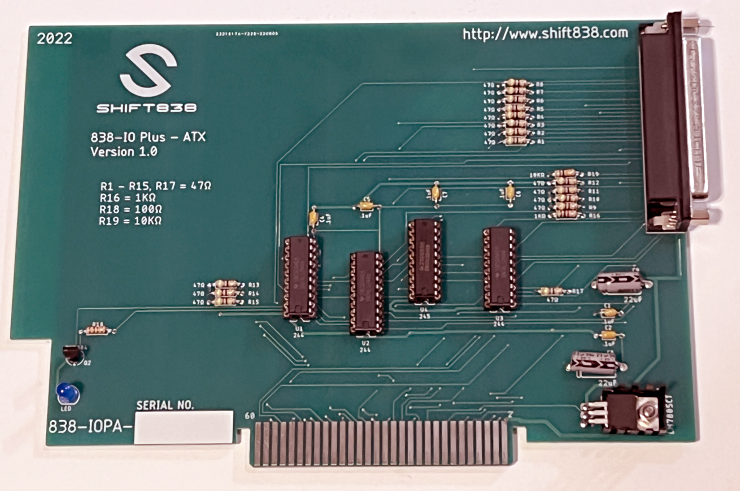
I wanted to post about the new 838-IO Plus vs 838-IO Plus ATX versions for use with the 838-PEB. I have redesigned the 838-IO Plus card that needs to be used with the 838-PEB. The ATX version is a bit shorter to allow for the cable to snake into the IO Port hole in the back of the PC case and plug directly onto the card without causing uneeded stress. With the 3 Mid tower cases I have, none of them would allow this with the standard 838-IO Plus card for the TI PEB as it was too long and put the cable in too much of a bind. So the ATX version was born. If you are planning to purchase a 838-PEB and will be using a mid tower case then you will need the 838-IO Plus ATX version of the PEB card. it will work with the sideport 838-IO Plus card as it has the same pinout requirements. If you id not purchase the origin 838--IO Plus card at all but plan on getting the 838-PEB then you will need the 8380-IO Plus ATX and the sideport version along with a cable to go between the two cards so the 99/4A and the 838-PEB card can communicate. You can see the difference of the PEB cards in the attached photos as the ATX version is more than 2 1/2 inches shorter.

-
Introducing the new 838-PEB Board from SHIFT838! Pre-orders will start very soon! Keep an eye out here and on AtariAge for when the pre-orders open and close. This board allows the user to replace their aging Peripheral Expansion Box with a PC style ATX case and ATX power supply which provides a more stable power supply along with much quieter. Works with your existing cards. This board comes with features to include external Gotek expansions, pass through power, internal PC fan connectors (4 x 12v), voltage breakouts for 3.3v, 5v and 12v! USB passthrough and standby power. Use of front USB ports for supply powering to USB devices or use with new MicroGoteks to USB storage media for the Gotek drives! 838-Latching Relay module to allow current PC momentary power switch to act as a latching switch. Press to power on, press again to power off! Check the two videos out below for more information. 838-PEB Part 1 https://youtu.be/Kap86ksHbUE 838-PEB Part 2 https://youtu.be/xh1Mq1HeC8M
-
All cables would be included. the power on controller will be an option to purchase as some users may just want to add a new power switch or swap out the existing momentary switch that is on the current PC case.
-
I have designed a new PEB for the TI-99/4A and Geneve 9640 computers. I have made a video explaining what is on the new 838-PEB as well as a short demonstration of it working. It's almost 28 minutes long between both videos that I combined. I have posted it on my YouTube channel link below. Video Here


