
CrossBow
-
Posts
1,378 -
Joined
-
Last visited
-
Days Won
31
Content Type
Profiles
Forums
Blogs
Gallery
Store
Events
Downloads
Blog Comments posted by CrossBow
-
-
On 3/14/2023 at 1:24 PM, peteym5 said:
Will there be any documentation to help programmers develop software for this BackBit Pro device?
It is just a flash cartridge similar to the Concerto or upcoming 7800GD. The main cartridge doesn't really do anything on its own without an adapter to interface it to the computer or console you want to use it with. From there it just provides an easy to use menu of your games. Select the game you want to play and it resets the system and starts up under the game you chose.
So it doesn't add anything to the console feature wise. Just a flash cartridge with built in pokey emulation.
-
16 minutes ago, RickR said:
This is getting really good, and I appreciate your testing posts very much!
NP and I'm glad I'm in a position to do so. I own more flash carts for the 7800 now than any other system I own in the collection as most of then only need one or two to do what I want. But as I service and work on so many 7800s (More than any other console by far), I feel I kinda need to have everything on hand so I can test as many configurations and options as I can for myself and my clients who might have the same hardware.
What I might have to do, is remove the Kiloparsec BIOS from my test 7800 and revert it back to stock BIOS. And then with Bob's permission, send Evie the Kiloparsec BIOS I've been using for her to install and test further.
Because I see the same behavior in both the Kiloparsec BIOS and the NTSC modified ones that have built in Asteroids... I will guess they both are similar designed and the reasons for the BBpro 7800 adapter not working as expected is for the same reasons in each BIOS type.
-
Evie released v1.91 yesterday for the BBPro and it has fixed a ton of stuff in the process and continues to impress me with her quick and continued support of her products.
As of version 1.91 all original released games are now confirmed working with my setup with a few small exceptions that I will mention below:
- Fatal Run still seems to auto start within a sec or two of the title screen coming up. Difference now is that it doesn't lock up the console and you can at least play the game. It also seems to auto skip the cutscene between levels that shows folks living and enjoying life, or turning into gravestones. But the shop works properly and it doesn't have any graphical glitches and is playable now.
- Summer Games is playable but has flickery white lines on the screen only during the opening ceremonies still but actual game events look correct and the game is completely playable.- Tower Toppler now loads up and works! But similar to many homebrews and both Summer/Winter Games, it has little flickery white horizontal thin lines scattered about the screen throughout the game.
- Winter Games like Summer Games has the same white flickery lines that appear during the opening ceremony. But again, actual game events look correct and the game is fully playable.
And that is really it! If you don't see a game listed, then assume that game is now playing and working as it should. So again all of the original released games are now fully playable with just a few showing some odd graphical anomalies during their game play as noted above.
Some other issues that appear to possible be unique to my test 7800s here, is that the Reset wire I mentioned is supposed to NO LONGER be needed. This is awesome news for everyone, but it seems that 7800s with custom BIOS in them like mine will still require this added reset wire for the time being. Not sure what the differences are but both the Kiloparsec BIOS that still isn't available publicly and the much more common Asteroids built in BIOS sold by Best and The Brewing Academy are the same and require the reset wire.
Atari 2600 games are also working again but similar to above, the custom BIOS seems to interfere with how this is supposed to work and so I have to work around the issue in my case on these test 7800s. In a nutshell the reset wire in my 7800s here is required, but also causes the 7800 to only reset into 7800 mode. As a result the 2600 game roms won't load up normally. However, if I disconnect the reset wire from the cartridge just before selecting a 2600 game, then the 2600 game will load up immediately and play without issue.
So there is a way I can at least get them to load up, but it is a PITA as it currently is for me and my 7800s here. In addition, after I've played said 2600 game and want to switch to something else, I have to reconnect the reset wire again in order to start up the BBpro adapter. I've made Evie aware of these issues but as she doesn't seem to have access to any 7800s with custom BIOS installed, it makes it difficult to figure out the problems.
This weekend, if I have time, I do plan to try and revert the Kiloparsec BIOS in my lab 7800 back to the stock BIOS setup and see if it behaves in the proper manner. My guess is that it will and would mean that for any with modified BIOS in their 7800, they might be better off to steer clear of the BBpro 7800 adapter until those issues are figured out and corrected. Which is sad because aside from this, the BBpro 7800 adapter is shaping up to be an excellent option for those looking for an easy to use flash cart for their 7800 and possibly other systems that the BBpro can support.
-
There has been several updates to the BBPro adapter since that post and quite a bit has been fixed in places. Here is the current summary of how things are. Some of this I'm unable to confirm as it appears the BBPro doesn't like consoles with modified BIOS in them like all three of mine do and the other two I'm currently servicing here now... sign.
As of update 1.9.0 the following is supposed to be fixed that are major:
- Reset wire isn't supposed to be needed anymore (However, I still can't get this working on any of the ones I have here as they all have modified BIOS in them)
- Pokey Support for games has been improved
- 2600 games are now working again (Again, I can't verify as the modified BIOS detection routines appear incompatible with BBpro thus 2600 games not working still for me)Here is the list of original released titles I've had trouble getting to load up. These were all taken using Trebor's v3 ROM pack:
- Ace of Aces will loads up with audio but has corrupted text in the menus and will lock to a black screen when trying to start a mission
- Basketbrawl goes to a black screen after the 7800 logo loader
- Fatal Run starts but then within seconds will try to load the demo mode and locks. Trying to quickly start a game will also black screen lock
- Fight Night menus have corrupted text and player graphics are corrupted along with all score info on the top of the screen
- Ikari Warriors title screen looks correct but game play sprites are corrupted including all enemy bullets, grenades, and power up items.
- Mat Mania Challenge has all player sprites corrupted
- Mean 18 has corrupted game graphics throughout but does try and play
- Meltdown fails to load with black screen after 7800 logo loader
- Midnight Mutants fails to load with black screen after 7800 logo loader
- Moto Psycho starts but lower half of game play graphics are corrupted
- Ninja Golf loads up but center portion has missing/corrupted player graphics along with corrupted graphics in map in the lower left. On the green with the dragon fights the lower half of the screen is full of corrupted graphics
- Planet Smashers loads but entire game play screen is full of corrupted graphics
- Scrapyard Dog fails to load with black screen after 7800 logo loader
- Summer Games is playable but has flickery white lines on the screen only during the opening ceremonies
- Touchdown Football will start up but then black screen when pressing reset to start the game
- Tower Toppler fails to load with black screen after 7800 logo loader
- Winter Games works but has the same glitching horizontal flickering lines during the opening ceremony
- Xenophobe, doesn't start, black screenSo there are still issues with many of the official games however, you may have noticed that the Activision titles are not listed anymore? That is because the versions of those games with the AB bank method in them do work and play normally. So it is only the original dumps using the original bank switching method that don't.
Also the Pokey audio has been corrected for Popeye and Keystone Koppers, but Keystone Koppers like quite a few other home brew games, will have thin flickering white horizontal lines across the screen while the game is running. As many home brews share this and it is the same effect seen in both Winter and Summer games, I suspect it has something to do with whatever graphical mode is being used and can likely be corrected in time.
I will update this blog as Evie releases major change updates.
-
Oh I was advised by a few others in the modding scene to just replace it and keep it to myself. But I don't see any value in hiding such a mistake. And in this case, it was easily avoided but also something very easy for anyone to do.
But sure, I could have just replaced out the board and let it go and none including the client would have been any wiser. But that isn't how I do things. I take it for what it was, a mistake and valuable lesson to be learned from the mistake I made in this case. And yes I let the owner of this console know what happened.
-
Not really the ultimate 5200. It has an old and no longer made s-video/cvbs processor board that was more time consuming and more damaging to the console to install vs the UAV we have today. Where I installed the AV jacks was NOT ideal and in fact I don't install them in the case shell anymore due to how thick the case shell is. It is best to install them on the expansion plate on the opposite side but as you can see, I installed my new dc power jack there instead. So a lot of things I did on this 5200 is not how I would do it these days. But it was what I did over 8 years ago when I first upgraded this 5200 and like a lot of things, I've learned much since then.
It could also be argued that to make it more ultimate, would be to install a Sophia RGB output board into it. But I honestly have always been quite happy with the s-video output from this 5200 even from this older board that I don't really desire anything better from it currently. I feel the same way about my 7800 in most regards as well.
-
Won't lie, I had to google that name to understand. I've never read Agatha Christie so I wasn't getting the reference at first.
And I'm just following the footsteps of the actual greats... those who actually engineered and designed these wondrous machines from our youth that helped fuel our imaginations in a way that only this new medium at the time could.
-
Okay, as I stated. Here is what it all looks like complete now.

Here is the wiring that has been done on the original AV jacks. I still need to wipe out the interior a bit to try and clean it a bit more but you get the idea on at least how the wiring on it is now. This is the overall wiring inside.

And here is a close up of the AV jacks with the new wiring in place. Hopefully this looks more cleaned up compared to before?

And I did manage to get pics of another console done in the same manner so you can see what I initially start off dealing with.

Once the wiring was removed off the TIA and the TIA itself was removed from the main board, this is what I'm left looking at.

I was able to straighten the legs back into shape but one of the legs is broken off a bit and shorter than the others. This is pin 12 which is part of the TIA audio but enough remains to allow it to still work.

But at least for now, this 2600 is alive and well again and ready for many more years of active gaming!
- Sabertooth, Atari 5200 Guy and RickR
-
 1
1
-
 2
2
-
-
3 minutes ago, RickR said:
Wow. Now that was a mystery that was tough to solve. I'm glad you stuck with it.
So is the owner. I'm surprised that the initial mod work that had been done, didn't cause more issues. But even in that pic I posted showing the old mod board in place, you can see that something doesn't look quite right with the cartridge slot on the far left side there. I just didn't notice it until I was pouring over the thing trying to diagnose what the issue was.
-
49 minutes ago, RickR said:
The UAV is more complicated to install, but I imagine the results are 100 times better (and more output options too).
The UAV is only more complicated in some installs compared to others. The normal process for a sixer and other consoles with the 4050 buffer on them, is to install the UAV onto a socket that you either replace the 4050 with, or in the case of the sixers you have to solder the socket to the top of the 4050 IC. The 4050 in the sixers also controls part of the fire button trigger signals so it is critical in these older 2600s to keep it in circuit.
The point being, you can purchase predone plug in versions of the UAV. (They cost more of course), but then you only have to solder in the socket and then just plug the UAV into the socket and run your output wires.
As for the quality of the output. The composite output is more consistent and of a better quality than most of the other composite only kits I've seen. The s-video is where the UAV really shines. However, the UAV was originally designed for the 8-bit computer line and as such, the color output from the UAV on the 2600 and 7800 isn't quite 100% accurate. But most people are not going to notice this. An example is that that some shades of green will appear much darker through the UAV than normal. A really good example of this, is the game Pitfall! where the tree trunks are a brown color through RF and most other kits but due to how the colors are handled and processed through the UAV, the tree trunks look more black. A small price to pay.
I also make the argument that using the plug in version isn't as friendly because you still have to set the jumpers to the right position and can be goofed up, plus the extra cost I'm not sure saves me that much more time compared to just soldering in a few wires and having more flexibility in how I install it. I do use the KIT version for the 5200 installs as that does save quite a bit of time. But I purchase the DIY kit vs predone as I only use the socket, PCB interconnect header pins, and the terminal block for the output wiring. I do NOT install the jumper header block as it is MUCH easier to just solder a few jumper leads to create the jumpers I need vs all 20 of the tiny pins for the header block. The point of the header block is to allow you to swap the UAV into other consoles, but I'm not likely to do that. Removing it and reinstalling it just weakens the socket connections so I just buy them and keep them in the consoles I set them up for.
The UAV really isn't that difficult to install. The easiest mistake I see made (Because I still do it myself from time to time), is soldering the wrong wire from the UAV to the resistors or soldering the wiring on he UAV to the outside vias vs the inside vias as they could be marked a little better to let people know. Even just putting small circles around the vias as silkscreen would help with that. But I can't make design changes to the UAV.
-
Well it seems to work. I did make one very tiny mistake in my trace layout where I forgot one of the traces for the chroma fix circuit. But it can easily be fixed in situ with just a tiny bit of solder. But this is what it looks like. A 7800 mount PCB that incorporates the chroma fix and audio mixing that I normally add as separate components to a 7800 install. Only here it is all together and designed so that the PCB and header connectors get soldered to the mount board first and then solder the mount board to the various resistors that the video and audio are tapped from. Additional header pins would also be installed on the top side wherein the UAV would sit onto those pins and then get soldered down permanently to the mount pcb. Once I get a better system in place for getting it all together and pre do the soldering for the SMD components, this should shave quite a bit of time labor wise off ITC installs with a more professional look in the process. While it might save some labor time, it isn't going to reduce the cost I charge to do this work since I have added extra parts into the mix with professional made PCBs now. Still I'm hopeful that this will bring that little bit of extra to ITC installs of the 7800 UAV.
Here is a short video of it in action...


-
1 hour ago, RickR said:
Soldering that 4050 surface mount would be a challenge for me. You'll have to share any tips you have for something like that.
It will be a challenge for me as well. I've soldered some fine pitch stuff before, but nothing like this as I believe they are only like .3mm width or something to that effect?
My plan, will be to lightly tin one of the legs in the corner. Line up the chip and tap my iron onto it to anchor that point down. If it bridges, it isn't that big a deal because the next step would be to apply liquid flux liberally to the pins and then essentially drag solder across the pins with the solder that is beaded onto the iron. From there, it would just be more flux applied and then some swipes with the iron from the chip outward across a few pins at a time. I did something similar when I did my DCDigital install on my Dreamcast and have done similar on UAV boards that arrived not quite working properly in the past.
-
This particular one, the owner stated it had been working fine and then suddenly it just didn't power on anymore. With flaky power switches, you can start to know something is up because they gradually get worse over time on actually turning the console on/off. But this one was totally dead as a doornail. I had to work my way backwards a bit through the flowchart before I finally found the main culprit.
It was odd though because the 201 seemed to be switching properly when the power button was depressed in that there was a change in voltage from it indicating something. But the actual 7805VR was never getting any input voltage. And since a bad VR wouldn't cause a lack of voltage to it at least, the only other component before the VR is the 201. So yeah, it was a bit odd and at first when I accepted the work request, I figured it was a bad switch, vr, or 7805 in pretty much that order.
That wasn't the case and is why I decided to talk about it a bit.
-
-
I guess you never figured out how to trick the enemies? When you have one on the screen... they usually moved straight to the same horizontal line that you are on. But if you start to move your character up and down kinda quickly..then the AI gets confused and what happens is that the enemy will then lock onto a horizontal plane path towards you, but won't move down or up to the same level as you. There fore, you sneak down and elbow punch them or reverse jump kick. Even the Abbobo's do this and I used to be able to get that pair of green Hulk ones just before the final base by lining them up on either side of me, moving up/down to have them lock into their paths and then elbow punch them one...then the other. Rinse...repeat.
If anything, the enemy AI is incredibly dumb given this trick and you can just decimate them.
The boss at the end is a push over as you only need to focus on him and hit him so he doesn't have a chance to shoot at you. When you defeat him, all enemies disappear and the game is over.
-

It is a good game for sure but I own the PC-Engine version of the game when I bought my JPN TurboDUO back during the 2010 CGE in Vegas. However, I've never been that great at shooters. In fact, the most recently one I've played and really enjoyed that I could get far in, has been Gradius Extra on physical cart for my Genesis. But that is because of the options you can play with that essentially give you unlimited continues and don't remove all of your powerups when you get killed.
-
To take good pics off a CRT, you need to use a longer exposure and NO FLASH. My Nikon has a night setting I can use that does a pretty good job with CRTs but I don't use that mode often since I've largely taken to just using my phone to take most still pics these days.
-
I played and owned a few Microprose titles on my 286 back in the day. I think the first game I played from them on my buddy's IBM model 25 or 30 was Airborne Ranger. He never seem to really get into it so I borrowed it from him and had a blast with that game. I still have it loaded up to play in Dosbox but simply don't have the controls remembers anymore nor the overlay that used to come with these back in the day to know what does what.
Other Microprose games I played and got really good at was Red Storm Rising and F-19 Stealth Figher (It would later be released as F-117A but essentially the exact same game). I own both of those games complete in box.
The only submarine games I got into and was really able to understand how to play was the aforementioned Red Storm Rising and Wolfpack by Nova logic.
I've heard of Silent Service but I didn't know anyone that owned it much less played it myself. I did play Lightspeed for a bit but it had a different name back then. Hyperspeed I think it was called? Didn't get far with that one.
Pirates! was another Microprose classic, but I only found about that game much much later on when I first played the Genesis version in the early 2000s and discovered Pirates! and Pirates! -Gold for PCs had come out prior.
- Justin and Atari 5200 Guy
-
2
-
Thanks for the comment Rick! I should have stated that in many cases, one can usually get away with just spraying a bunch of contact cleaner into a switch and follow that up with some IPA and then the dielectric without having to completely gut a switch apart. But in the case of these va0 Saturn model 1 units like mine. The switch is essentially an enclosed housing. And the way the switch is oriented when installed, means that hitting it with contact cleaner and IPA will just cause it to pool up and not actually drain out properly. That would be an issue all on its own as the gunk doesn't get removed and just ends up drying up over time and still in the way.
It also doesn't help that the switches used in these earlier models are near unobtanium to get these days. I've only found on selling on the internet that has replacement switches exactly like what was used, and they want about $55 Aussie bucks for them. Yeah... Australia appears to be the one place the switches can be purchased. I'm sure a modern replacement could be used and installed in a 3D printed bracket or something, but yeah... like the Veccy as you mentioned, the power switches aren't common on these earlier models so if you can clean and repair them, it is best to do so.
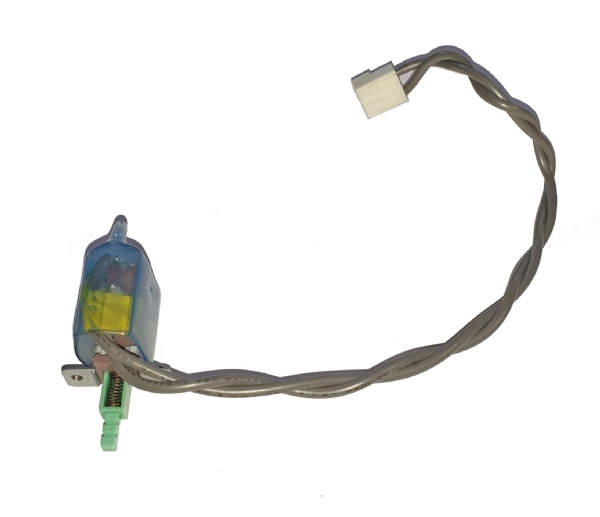
Here is what it looks like btw. model 1 va0 power switch assembly.
-
Yeap... if you take a look I just got some of them brought over. The issue was that I did have the RSS option disabled on hardware blog I have over there and thus, couldn't import it initially. Now I need to figure out how to get the new entry I made here... over there... LOL. But I think I can get it figured out and now that the AA one is linked to here, anything I do there should cross over to here as well then?
-
I will see what I can do, but I honestly don't see the RSS icon on either of my Blog sections here or at AA. Then again, I don't believe I checked that option to be on when I initially created them and that is likely why I don't see them.
-
9 hours ago, Justin said:
Enjoyed this blog entry greatly. You can always export this blog elsewhere, and import your AA blog entries here using RSS. Terrific post.
I've never figured out the RSS thing so I would need some explanation and assistance on how that is done exactly?
- Justin and Sabertooth
-
2
-


.thumb.jpg.9423408563f435b0c2ee6811383d62c9.jpg)
A New Challenger Approaches! - A7800 BackBit Pro Adapter has arrived at the ITC!
in - ITC Chronicles - :- Stories from the Ivory Tower Collections
A blog by CrossBow in Atari I/O Magazine
Posted
The HOKEY in my concerto was sounding pretty bad in most stuff as well. Until his new .96 update. Once I updated to that, then Bently's Quest now sounds much closer to what it should. Although final roms of many of the recent homebrews still produce the wrong audio or no audio at all on my concerto setup. I'm not even using my concerto as I've been using the Backbit adapter in the lab and stick with my DragonFly for everything else for the time being.